


Help Center
Setup, troubleshooting and order questions, answered. Can't find yours? Send us a message.
Orders
We'll email you tracking details as soon as your order ships.
If it hasn't arrived by the expected delivery date, send us a message with your order number and we'll help you track the package.
We can change the shipping address as long as your order hasn't shipped yet. Send us a message with your order number and the new address, and we'll confirm the change.
Once an order has shipped, we can't change its address. You can follow it with the tracking link in your shipping email.
We can edit your order as long as it hasn't shipped yet. Send us a message with your order number and the change you need, and we'll confirm.
Once an order has shipped, we can't change it.
You can cancel your order as long as it hasn't shipped yet. Send us a message with your order number and we'll confirm the cancellation.
If your order has already shipped, we can't cancel it, but you can start a return once it arrives.
Items are damaged
We're very sorry to hear this. Send us a message with your order number and we'll reply by email. Include photos of the damaged items in your reply so we can get it resolved.
OVR Sprint
To use OVR Sprint with multiple lanes, simply set each lane on unique channels. This will ensure they lanes do not cross talk.
Yes, although note that for moving triggers (flying times) the OVR Sprint is highly recommended to be set up elevated off the ground.
You can set the OVR Sprint at whatever height you like for your drill and preference. You can even place one on the ground if you want to start off the athletes feet or hands.
Often, just above hip height is good to avoid the knees or arms from blocking it early.
Without App: At any time, you can reset the timing by quick clicking both buttons on the device. Note if the app is connected and in the live data screen, this will not work (must go through app).
With App: If timing is in progress, tap the "Reset" button on the live data screen in the app.
Red: Lasers are not active or blocked
Green: Lasers are active and not blocked
Blue: Timing is in progress on Single Mode
Orange: In-Beam Start is initialized and the athlete can leave the laser
Yes, one OVR Sprint device can be used by itself. This is often done for agility drills like an 5-10-5 Pro Agility. Just ensure the single device is on Home mode.
You can link up to 16 timing gates together.
OVR Sprint 2 Gate Setup Walkthrough
- Gate 1: HOME, SINGLE, Spectate OFF, In Beam / Trigger Optional
- Gate 2: LINK (same channel)
- Timer will reset after finish gate is crossed. Optionally you can click both buttons if the timer is started and needs to be reset.
- LEDs are BLUE on the HOME unit while timing is in progress
OVR Sprint 3+ Gate Setup Walkthrough
- Gate 1: HOME, MULTI, Spectate OFF, In Beam / Trigger Optional
- Gate 2: LINK (same channel)
- Gate 3: LINK (same channel)
- To reset the timer, either click both buttons on the HOME device or use the app (blue button on live data screen)
This will go through the modes, settings, and what each screen should look like. It also goes through using the mobile app. If you continue to have issues, let us know where you get stuck!
This is due to the Spectate Mode setting being enabled in the app. Go to the profile / settings table and ensure the Spectate Mode toggle is off. Also ensure Spectate Mode is toggled off in the devices settings (hold both buttons to reach).
The timing gates have a minimum time between splits of 0.300s, so if the time between the gates of the athlete is less, it may not pick up. This is done to reduce noise in data.
The timing gates have a minimum time between splits of 0.300s, so if the time between the gates of the athlete is less, it may not pick up. This is done to reduce noise in data.
Single Mode
Single Mode records based on a start and stop. It does not record multiple splits. Timing begins after the first gate trips, and stops after the second gate trips. This can be two different gates, or passing the same gate twice.
Multi Mode
Multi Mode allows you to record multiple timing splits. Manually reset the device through the app, or by clicking both buttons on the Home unit. Timing begins after the first gate trip, and after each trip it will show the split time, and total time. Use Multi Mode with any number of gates.
Yes! With OVR Sprint you have flexibility to use any number of gates. Use them in whichever order / direction you want. Set them up your way and begin!
Trigger start allows the athletes to start from an audible starting cue. All gates will play an audible 'beep', starting the timer.
- On the Home unit, turn on Trigger Start
- When ready, quickly click both buttons at the same time on the home unit to begin timing. All devices will beep to indicate the start.
Optional: By starting with a gate at the starting line, you can also test reaction time.
In Beam Start allows the athlete to begin in the laser beam. The timer begins when the athlete leaves the laser.
- Go to the settings on the Home unit and turn on In Beam Start
- Have the athlete block the starting laser for about 1 second to initialize
- Once the athlete unblocks the laser, timing will begin
Spectate mode allows you to use an extra device as a mobile display. This device's sensor will not be used.
- Setup the gates that will be used for timing along the track / drill. Set all these all to Link.
- Take an extra receiver on the same channel, set it to Home, and turn on Spectate
- All your data will now be ready to the spectate device, which can be used anywhere.
There are 10 channels available.
- Set one device to a "Home" unit
- Set all other gates to "Link" units
- Ensure they are all on the same channel
All the link units will connect to the Home unit, where all your times will show.
No. Since the gates are easy to align, there is no precision needed to connect the laser.
Device: Change the device between a home and link unit
Mode: Choose between Single (auto-reset) and Multi (unlimited splits)
Channel: Use multiple lanes of timing gates on different channels
Beep: Turn the audible sound on/off when the beam is broken
In-Beam: Start the timer once the athlete leaves the laser
Trigger: Start the timer with a manual start (uses audible beep to begin)
Spectate: Use an additional device as a portable display
OVR Sprint uses a 1/4-20 threaded insert, standard for all tripod screws.
No! You can use OVR Sprint at peak daylight without any issues.
No. Please do not use the devices with any rain or exposure to moisture.
Yes! By using infrared, there is no precision needed to align each timing gate. Point the sender towards the receiver and the signal will read (status LEDs turn green).
OVR Sprint measures 1000 times per second for accuracy down to the millisecond. Our devices have been placed alongside gold standard competitors with great reliability.
The app is not required to begin timing sprints and drills. All settings can be changed on the device, and all your data will appear on the built-in display.
The sender and receiver can be up to 15 feet apart.
Range will differ depending on environmental conditions and line of site. Under good conditions, you can expect 150 yards of range.
The receiver lasts about 8 hours, and the sender lasts about 12 hours. Both devices charge in approximately 90 minutes.
OVR Force
Two years. OVR Force is warranted against defects in materials and workmanship under normal use for two years from the date of purchase. If a covered defect comes up, we repair, replace, or provide an equivalent remedy at no charge. To make a claim, email us through our website with your order number and a description of the issue.
Yes. The OVR Connect app exports your results to CSV, so you can pull your data into your own spreadsheets, reports, or tracking system.
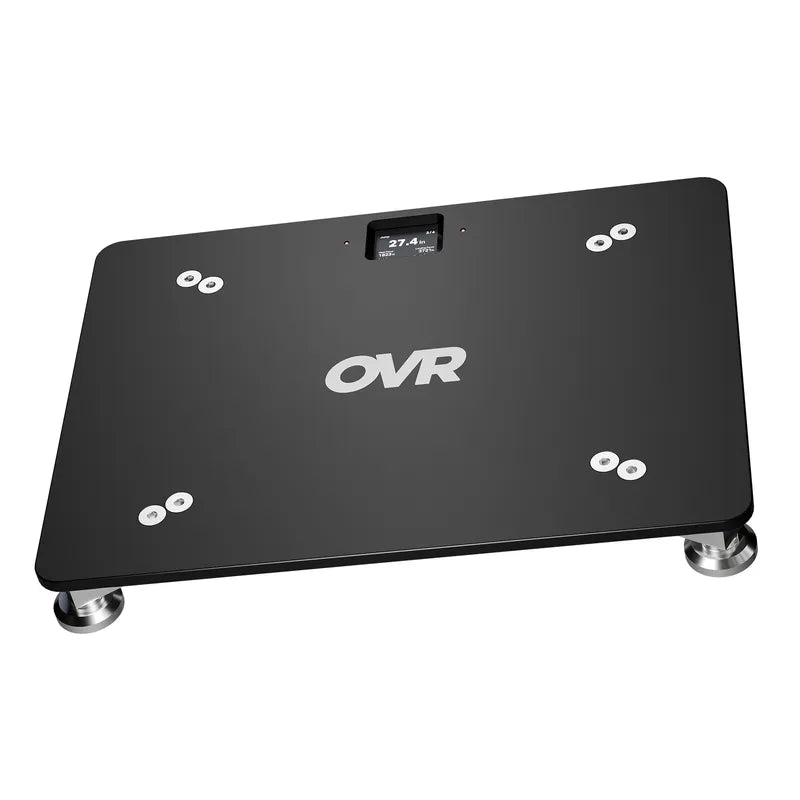
OVR Force has adjustable feet to ensure it can be used on any surface. Place the force plate down and if there is any rocking, simply unscrew one of the feet to level it in place.
OVR Force works on any firm, flat surface: a weight-room floor, a lifting platform, concrete, or low-pile rubber gym flooring. It has adjustable feet, so if the surface has any rock to it, you unscrew one foot until the plate sits solid. For the most reliable readings, avoid thick, spongy mats or high-pile turf that flex under load, since a compliant surface can let the plate move. If that is all you have, set it on a firm board first.
600 x 450 x 66 mm each, about 23.6 x 17.7 x 2.6 inches. A single plate is large enough for jumps and isometric work on its own, and two side by side give you an even larger surface.
Each plate weighs 31.8 lb (14.4 kg).
Each plate is rated to 4,000 lb.
OVR Force was built with durability in mind. The top surface is half-inch hard-anodized aluminum on stainless steel feet, made for daily use in a real weight room. It is rated to 4,000 lb, and uses top of the line materials for repeated use.
Up to 18 hours of use on a charge, rechargable over USB-C. After a few minutes with no activity the screen dims to save power and wakes the instant you step on.
With the dual setup, yes. You get directional asymmetry (which side is producing more force, and by how much), and on jumps you can see asymmetry broken out by phase: braking, propulsive, and landing.
Use any USB-C data cable to tether two plates together. Plug it in, and click a button on the plate you want as the right side. Unplug at any point and each plate goes back to working on its own.
Yes. Every OVR Force plate is fully standalone, so you can buy one now and add a second whenever you are ready. To go dual, you tether the two plates together with a USB-C cable and they act as one system, unlocking left and right asymmetry data and a larger combined surface. Nothing is locked to a starter version. A single plate is the complete product.
The two differences are the surface area and asymmetry data. A single plate cannot measure asymmetry, while dual plates can. If you want the extra surface area or asymmetry data, dual plates are recommended. Otherwise, one single plate will measure everything you need.
Hold the Left and Right buttons together for about a second to open Settings, then select Metrics. From there you choose what fills each of the five slots (one primary, four secondary) for the mode you are in. Your selections are saved on the device.
Athletes can run it themselves. Color-coded badges and an LED strip show exactly what to do next, so the athlete can perform tests on their own.
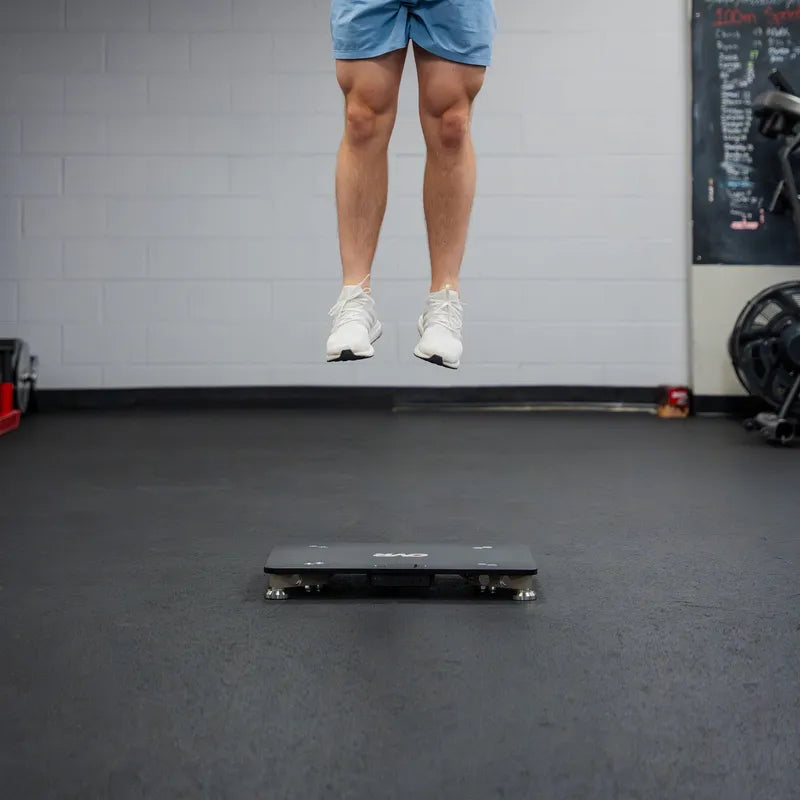
OVR Force auto recognizes the style of jump performed and measures data accordingly (countermovement jump, squat jump, drop jump, etc).
No mobile device is required, everything is measured on the plate. Results appear on the built-in screen the moment a rep ends. The app is optional and adds history and deeper analysis, but the plate is fully functional on its own.
It reads force in 1 N steps (0.22 lb) at 1,000 Hz, the same rate used by the professional-grade plates that cost five to ten times as much. It was validated head to head against a gold-standard reference plate, with peak force agreeing within half a percent. It is rated to 4,000 lb. See the full validation study report on our website.
The OVR Force, a 1-meter USB-C cable used for both charging and tethering two plates together, a charging block, and a quick-start guide.
No subscription. The OVR Connect app is 100% free, and the product works on its own.
OVR Force has three modes, and it guides you through each one on screen.
Jump Mode: for anything where the athlete jumps on the plate: countermovement jump, squat jump, drop jump, and RSI hops. It auto-detects the jump type.
Force Mode: for standing isometric work where the athlete is on the plate: mid-thigh pull, isometric squat, and calf isometrics.
Free Mode: for tests where the athlete is not standing on the plate but still pushes into it: shoulder internal and external rotation, glute bridges, and the 90-90 hamstring.
The rule of thumb: jumping means Jump Mode, standing on it and pushing means Force Mode, loading it from off the plate means Free Mode. You switch modes in Settings.
Almost any test can be done across the three modes. The plate sits flat on the floor and measures any test where force is directed down into it.
Jump Mode: countermovement jump, squat jump, drop jump, RSI / repeated hops, single-leg CMJ, and bilateral jump asymmetry (dual plate).
Force Mode (standing isometric and loaded work): isometric mid-thigh pull (IMTP), isometric squat, calf isometric (bilateral and single-leg), bodyweight squat, loaded squat, and unilateral heel raises.
Free Mode (off-plate isometric): shoulder internal and external rotation (and the ER:IR ratio), bilateral and single-leg glute bridge, and the supine 90-90 isometric hamstring.
Three modes cover most testing needs:
Jump Mode for countermovement jumps, squat jumps, drop jumps, and RSI testing.
Force Mode for standing isometric work like mid-thigh pull, iso squat, and calf iso.
Free Mode for non-standing isometrics like shoulder or hamstring tests where you load the plate from scratch.
It captures metrics like jump height, rate of force development, peak force, impulse, asymmetry, and much more.
No. The plate works completely on its own. It has its own screen, battery, and hardware built in. No phone, tablet, laptop, or external software required. Turn it on and step on.
Strength and conditioning coaches, sports performance coaches, physical therapists, athletic trainers, and serious individual athletes. Anyone who wants objective force data to guide training or return-to-sport decisions.
OVR Force is a portable, standalone force plate system. You step on it and it measures the force your body produces during jumps and isometric exercises, then shows the results right on the plate. It brings force measurement that used to be reserved for elite labs to any gym, clinic, or weight room.
OVR Jump
Yes! See the video below on the recommended setup for approach jumps.
To measure Ground Contact Time (GCT), which is required for Reactive Strength Index (RSI), there must be a drop into the lasers from an elevated surface. Since a standing jump or CMJ does not come from outside the lasers, and touch the ground for a brief amount of time, there is not ground contact time to be measured.
OVR Jump works on essentially any surface. As long as the lasers have a clear path from the sender to receiver (1/2" off the ground), you are good to go.
Turf, concrete, track, gym, outdoors and much more!
We released a free 6 week conjugate training program to help athletes program jumps into their training. Click the link below to check it out!
We always recommend the forwards setup when possible, with one foot in the middle of the long bar. As long as one foot starts in the lasers, and one foot lands in the lasers, you are all set.
The sideways setup has the potential for the athlete to jump outside the lasers, with their heels falling back down afterwards. This can throw off readings.
The forwards setup standing centered on the bars has the potential for the feet to not block the lasers (shining in between feet).
Check out the video below for a more in depth demo on the setup of OVR Jump!
OVR Jump has some key advantages over jump mats:
Weight: Just 1.6 pounds compared to around 40 pounds
Jumping Area: Ability to tether multiple bars together for massive jumping zones
Display: The device has an onboard display that instantly updates. App is not required
Jumping Surface: Jump on essentially any surface, and don't be limited to the mat
Affordability: Without the need for a large rubber mat, we pass the savings onto you
The device has three modes:
Vertical Jump Mode
- Measure vertical jump height
- Start in the lasers, jump up, and land back in the lasers
RSI Mode
- Measures jump height, ground contact time, and calculates RSI (reactive strength index)
- Start outside the lasers, land in the lasers, quickly jump up, and land back in the lasers
GCT Mode
- Measures ground contact time
- Start outside the lasers, land inside the lasers, and jump out
You can change between modes in the device settings, or with the app!
OVR Jump will continue to read jumps with no limit. It will continue to read as long as you continue to jump.
When it reaches 100 jumps, it will reset the stored data and continue to record with no delay.
The sender can be placed up to 20 feet apart (sometimes even further under good conditions).
We recommend placing them at least 4 feet apart.
The rest timer will reset after every jump, giving you your current rest time to the second. When on, it will appear at the top of the device display.
You can turn the timer on or off in the device settings.
OVR Jump is only 1.6 pounds (both bars), saving you lots of space and making the system highly portable.
No. The weight of the athlete has no effect on readings.
Since the system is based on lasers instead of force, it measures the presence of the athlete, and doesn't rely on weight or pressure.
No! There is not resetting needed when changing between athletes. Once one athlete walks out, the next can step up and jump immediately with no additional steps.
Both bars are made of anodized aluminum to protect the device from damage.
The minimum jump height for the OVR Jump device to record is 6 inches or 15 centimetres. Jumps below this height will not be registered by the device.
Yes, all devices have imperial and metric readings. Navigate to the device settings to change the units!
In the app, go to your profile tab to choose your preferred units.
Differing from other jump measurement products, OVR Jump's laser system is able to directly measure the athlete's presence on the ground, without a weight threshold. Due to this, we see very consistent readings.
With proper use, OVR Jump is very consistent at measuring jump height, RSI, and GCT. An athletes position is measured 1000 times per second to ensure precise measurements.
Without the pressure thresholds that can be present on jump mats, you'll get reliable readings each and every jump!
OVR Jump uses a laser technology to instantly sense when an athlete is on or off the ground. This allows it to measure key metrics about an athletes jumping and reactive strength.
Contrary to common belief, the laser jump system isn't consistency susceptible to "cheating".
While the athlete could pull their legs up to land later, this will feel and look awkward for the athlete as well as their coach. It's also the shortest portion of the jump, so flight time isn't significantly altered.
Some scenarios can require extra room for the athlete the jump without thinking about landing within the 18" receiver.
For example, on an approach jump, the athlete often doesn't want to be limited to one area. They want to focus on reaching their peak height.
For this reason, we allowed receivers to be tethered together, so the effective jumping area can be doubled, tripled, or even more!
We recommend the following distances when tethering:
2 devices: 8 feet or more
3 devices: 12 feet or more
4 devices: 16 feet or more
5 devices: 20 feet or more
Always test different setups to ensure the LEDs on all tethered receivers turns green!
No, the OVR Connect app is not required to tether devices together. You can enable tether mode directly on the OVR Jump devices by configuring the "Home" and "Link" settings in the device menu, ensuring all devices are on the same channel. This uses a fast and stable connection without the app.
The OVR Jump device has 10 tether channels, allowing multiple sets of receivers to operate in the same area without interference.
We do not currently offer individual receivers for tethering. As the cost of this would be so similar to a full set, it didn't make sense to offer it as a standalone product.
Have multiple sets allows for the versatility of one large area, or two smaller stations!
Tether mode allows you to extended the laser barrier to ensure an athlete never jumps outside the range of the 18" receiver.
Follow the instructions below to use multiple OVR Jump's to achieve 36", 48", or even more width!
- Turn on at least two OVR Jump receivers and navigate to the settings (hold both buttons for about one second).
- On one receiver (home device):
- Change the "Tether" setting to "Home"
- Note the channel it is on
- Exit the settings (device will reset in home mode)
- On another receiver (link device):
- Change the "Tether" setting to "Link"
- Ensure the channel matches the home device
- Exit the settings (device will reset in link mode)
- Repeat these steps for additional tethered bars
- Set up receivers side to side with hidden magnets in the end caps
- Pull the sender (short bar) far enough away to reach all tethered receivers (green LEDs).
OVR Velocity
Velocity Based Training (VBT) has many core benefits:
Track Progress
Track progress through bar velocity. It can be difficult to see real progress with typical sets and reps without max intent.
Compare your bar speeds from week to week to see small improvements each training session. This also creates more opportunities to see improvement, motivating athletes for every rep, set, and training session.
Increase Intensity
Increase intensity by giving an athlete instant feedback on performance. When each bar speed is measured, an athlete instantly wants to achieve higher velocities, and hit new PRs.
Tip: For athletes working in pairs, use the resting athlete to call out each velocity, motivating the lifting athlete.
Monitor Fatigue
Monitor fatigue by comparing data real-time to your performance in the past. Your bar velocity day to day will change due to your recovery.
Notice your bar speeds at a certain weight are significantly lower than usual? It may be good to reduce intensity.
Notice your bar speeds are higher than usual? This is a good day to push your limits.
Tailor Training
Tailor training by moving at a bar speed that matches the goal. The speed of your training has a large effect on the adaptation.
Want to improve absolute strength? Work at lower velocities. Want to improve explosive power? Work at moderately high velocities.
Reduce Risk of Injury
Reduce risk of injury by using data to make informed training decisions. Let VBT tell you at 50% of 1RM that you are more fatigued than usual, as opposed to at 95% of 1RM.
Prevent "ego lifting" and see your athletes care less about the weight on the bar, and more about how fast the bar is moving.
We created a VBT starter guide to understand the general concepts and get started! Click the link below to check out the free PDF.
No, the weight inputted will only affect the power output and force readings. All velocity readings will not be affected by the weight.
If you aren't worried about power readings, you do not need to adjust the weight on the device when changing weights.
If you are doing power cleans with OVR Velocity, we recommend adjusting the minimum ROM to filter out the second concentric motion. For instance, if this was set to 18", the device will only record motions over 18".
- Hold both buttons for about a second to reach the settings
- Navigate to "Min ROM" with the left button
- Adjust the value with the right button
As athletes and coaches ourselves, we had the following goals for our VBT device:
- Simplicity
- Ease of Use
- Accessibility
Other options would require app setup to get effective data, or show you excessive metrics, making it confusing what to focus on. They would even be difficult to control without connecting the app.
We focused on the user, giving them the option of the app. Even without, the device is simple and intuitive through the two buttons. Scroll through reps, change settings, and get all your instant feedback.
We also knew it had to be affordable, so every coach or athlete has the chance to upgrade their training. We optimized for a larger group of athletes and coaches, allowing us to pass the savings onto you!
The rest timer will reset after every rep, giving you your current rest time to the second. When on, it will appear at the top of the device display.
You can turn the timer on or off in the device settings.
Average velocity is best for strength-focused lifts, as it measures overall performance during the movement. Peak velocity is ideal for explosive movements, where the focus is on the fastest point of the lift.
No. There is no resetting needed when interchanging exercises or athletes. The device will record any concentric motion of any exercise, with no calibration needed.
The device samples at 100Hz (once every 0.01s) to ensure a high level of accuracy.
To customize which metrics are shown on the device display:
- Hold both buttons for about a second to reach the settings
- Select "Screen Layout"
- Use the left button to cycle through screen locations, and the right button to cycle metrics
- Once complete, select "Save"
- The main display will now show the selected metrics
Yes, all devices have imperial and metric readings. Navigate to the device settings to change the units!
In the app, go to your profile tab to choose your preferred units.
To ensure results are accurate, place the device directly below where you will be performing reps. For non-vertical movements, ensure the device is in line with the range of motion.
Ex. Don't place the device under the racked position of a lift, as the movement will likely be offset from this position.
OVR Velocity gives you 7 metrics for each and every rep!
Average Velocity (m/s): The average speed of the movement across the full range of motion.
Peak Velocity (m/s): The highest speed reached at any point during the movement.
Range of Motion (in/cm): The total distance the load travels during the movement.
Average Power (W): The average power produced across the full range of motion.
Peak Power (W): The highest power produced at any point during the movement.
Time to Peak Velocity (s): The time from the start of the rep to when peak velocity is reached.
Elastic Acceleration Index: Peak velocity divided by time to peak velocity. A measure of how quickly speed is produced.
The minimum ROM can be configured on the device between 6" - 36". To change this, follow the steps below:
- Turn on the device
- Hold both buttons for about a second and release to reach the settings
- Use the left button to navigate to "Min ROM"
- Use the right button to change the value
This setting will be saved on the device after turning on / off.
The unit has four magnets on the bottom of the device to fasten to any small weight plate or other metal surfaces.
The device will continuously record reps, and reset its data if 100+ reps are recorded.
OVR Velocity was included in an independent study where it was validated for accuracy against the "gold standard" in VBT.
It has also been put head to head with other VBT devices with reliable results.
You can also trust that unit to unit the readings will align. With multiple devices placed on the same bar, readings are almost identical on each device.
The rope of OVR Velocity is approximately 10 feet or 3 meters. Do not fully extend the rope.
OVR Connect
Data from OVR Connect is stored in the cloud, allowing you to access your data on any device signed into the OVR Connect app.
OVR Connect works with
- OVR Velocity
- OVR Jump
- OVR Sprint
Please contact us and we can help reset your password.
To stop recording a video in OVR Connect, during recording, hold down anywhere on the screen to stop.
Below are some rough numbers on the MVT's, on a spectrum depending on the experience option in the app.
Bench Press: 0.12-0.25
Squat: 0.25-0.35
Deadlift: 0.15-0.25
To export your data from OVR Connect
- Go to the profile tab (right tab)
- Tap on "Export Data" button
Yes! To change units, go to the profile / settings tab and adjust the "Units" setting.
Yes! On the live data screen, a rest timer will automatically appear in between sets. There is also a rest timer on the device you can toggle on and off.
You can set thresholds for average velocity, peak velocity, and velocity loss:
- Pick an exercise or Sandbox Mode
- Tap on the "Target" option while inputting weight
- Use the sliders to pick your threshold metric, and the velocity thresholds
The ring on the live data screen will be red, blue, or green depending on how that reading compares to the thresholds set.
- Go to the profile / settings tab
- Tap on the "Video Setup" option
- Tap on the metrics to customize how they show on the video overlay
To switch between average and peak velocity for the live data screen in the app, tap on the main circle.
To get audio feedback for OVR Velocity through the OVR Connect app:
- Make sure you have the latest version of OVR Connect
- Go to the profile / settings tab
- Toggle on the "Audio feedback" setting
- When a set is started through the app, each velocity will be played through the app
- It will read out average or peak velocity depending on what the main circle is showing. Tap the circle to switch between average and peak.
- Go to the past data tab (left tab on bottom bar)
- Select the exercise you'd like to delete data for
- Scroll down and select the session where this data is located
- Find the set you'd like to modify
- If deleting the whole set:
- Tap the delete icon (trash can) and confirm to delete the full set
- If deleting rep(s):
- Tap the edit icon (pencil)
- Select the reps to delete
- Tap the delete icon and confirm
- Reach the live data screen by selecting your exercise and the related steps
- Tap the red video icon in the bottom left corner
- Tap the record button to begin recording
- To stop recording, hold down anywhere on the screen.
- After stopping, the video will preview
- Tap on the top right to share / save the video
- Tap the exit icon in the top right to exit the video screen
The app is available on iOS and Android. Go to your store and search 'OVR Connect' to check if your device is compatible.
If the app downloads to your device, opens, and operates properly, it will work with our products!
The estimated 1RM with OVR Velocity will show on the past data screen for squat / deadlift / bench press exercises.
It will use your best velocity at each weight recorded, and needs at least 3 weights to begin estimating. A trend line will be calculated, finding the weight of your slowed possible rep (minimum velocity threshold).
If the e1RM seems inaccurate, it may be due to the following:
- Minimal data saved in exercise
- Some of the weights best velocities were not maximal intent
- If your e1RM is lower than an actual rep completed, this may indicate you achieved a rep slower than the estimate MVT
Note your MVT will be estimated based on the lifter experience setting on the profile tab.
OVR Velocity
- On the exercise section screen, tap the edit icon (pencil) in the top bar
- Tap the '+' icon in the top right
- Enter your exercise name, choose the icon, and tap 'add'
OVR Jump
- Tap on the mode you'd like to create the exercise for (vertical jump, RSI, or GCT)
- Tap the edit icon in the top right (pencil icon)
- Tap the same box (now a plus icon)
- Enter your exercise name and tap 'add'
OVR Sprint
- On the exercise section screen, tap the edit icon (pencil) in the top bar
- Tap the '+' icon in the top right
- Enter your exercise name, choose the icon, and tap 'add'
Sandbox Mode allows the app to be used without saving the data to the logged in profile. This is like a 'free mode'.
Use sandbox mode when you're just playing around and don't want to save data, have a friend who wants to jump in for a set, or in a team setting where many athletes are circulating the same rack!
Currently, OVR devices and the OVR Connect app do not support roster management or connecting multiple athletes to the app at the same time. Each app account is individual to an athlete.
Many coaches like to use the devices to show data during workouts and share the results with athletes in their own way. Sandbox Mode can be used in the app to allow the mobile device to act as a heads up display without saving data.
Find the OVR Connect app on the iOS App Store or Google Play Store.
The app is free! There is no cost or subscription to use the app alongside your OVR device.
The app is free! There is no cost or subscription to use the app alongside your OVR device.
No! The devices are fully functional and show you all your metrics from the onboard display.
While the app gives the user a more seamless experience, it is not required.
Troubleshooting
Please watch the video below for a full overview on setting up OVR Sprint. This will go through the modes, settings, and what each screen should look like.
OVR Sprint 2 Gate Setup Walkthrough
- Gate 1: HOME, SINGLE, Spectate OFF, In Beam / Trigger Optional
- Gate 2: LINK (same channel)
- Timer will reset after finish gate is crossed. Optionally you can click both buttons if the timer is started and needs to be reset.
- LEDs are BLUE on the HOME unit while timing is in progress
OVR Sprint 3+ Gate Setup Walkthrough
- Gate 1: HOME, MULTI, Spectate OFF, In Beam / Trigger Optional
- Gate 2: LINK (same channel)
- Gate 3: LINK (same channel)
- To reset the timer, either click both buttons on the HOME device or use the app (blue button on live data screen)
Most common issues:
- Not having one device on HOME, other devices on LINK
- Having settings on without knowing (In Beam Start, Spectate Mode, Trigger Start)
If you continue to have issues, please let us know where you get stuck!
Note: Sending a video of your devices not working will allow us to solve the issue much quicker
If the receiver isn't picking up the laser, try the following steps:
1. Check the sender
- Ensure the sender is powered on and the battery isn’t dead.
- Confirm the sender is positioned correctly, with the laser pointed toward the receiver.
2. Ensure proper alignment
- Make sure the sender and receiver are aligned correctly.
- Verify that nothing is blocking the path of the lasers.
3. Inspect the receiver LEDs
- Green status LEDs indicate the lasers are being received.
- Red status LEDs indicate the lasers are blocked or not found.
If the issue persists, please contact our support team through our website for further troubleshooting.
If tether mode isn’t working, try these steps:
1.Check the setup
- Ensure the devices are positioned side by side with the magnets aligned.
- Use only one sender placed at an appropriate distance to cover all linked receivers.
2. Verify the settings
- Set the primary device as "Home" in the tether settings.
- Set additional devices as "Link" and ensure they are all using the same channel.
3. Inspect the LEDs
- Ensure the status LEDs on the "Home" unit change from green to red when the linked unit is blocked.
- All units should have green LEDs when
4. Unique channels for multiple setups
- If multiple tethered setups are being used in the same area, assign a unique channel to each group.
If you’ve followed these steps and tether mode still isn’t functioning, contact our support team for further assistance.
If your OVR Jump device isn't recording jumps, try these troubleshooting steps:
- Wrong Jump Mode
- You may be in the wrong mode. For standard vertical jumps, use "Vertical Jump" mode.
- RSI mode requires repeated jumps inside the lasers
- GCT mode is meant to jumps where only the ground contact is inside the lasers (hurdle hops, box jumps, etc)
- Lasers not connected
- When nobody is standing in the laser barrier, the LEDs should be green. If they are red, they are not connected.
- When stepping in the laser barrier, the LEDs should go from green to red.
- Not reaching minimums
- Vertical Jumps must be 6in / 15cm or higher
- RSI jumps must be 6in / 15cm with a ground contact time less than 1 second
- GCT recordings must be under 1 second.
- Jumping in Lasers
- At least one foot must be in the laser barrier on takeoff and landing of the jump. LEDs will change between red and green to show this.
How to Set Up OVR Jump
How to Use RSI on OVR Jump (Depth Jumps)
If you’ve tried these steps and jumps still aren’t being recorded, reach out to our support team through our website for further assistance.
If the receiver isn't picking up the lasers, try the following steps:
1. Check the sender
- Ensure the sender is powered on and the battery isn’t empty.
- Confirm the sender is positioned correctly, with the lasers pointed toward the receiver.
2. Ensure proper alignment
- Make sure the sender and receiver are at least 5 feet apart and aligned correctly.
- Verify that nothing is blocking the path of the lasers.
3. Inspect the receiver LEDs
- Green status LEDs indicate the lasers are being received.
- Red status LEDs indicate the lasers are blocked or not found.
4. Adjust the setup
- If the lasers are not detected, try repositioning the sender and receiver, ensuring a clear, unobstructed path.
Also see the video below on the OVR Jump setup process.
If the issue persists, please contact our support team through our website for further troubleshooting.
If your OVR Velocity device is measuring reps backward (showing eccentric instead of concentric measurements), follow these steps:
- Go to the device settings by pressing and holding both buttons until the settings menu appears.
- Locate the "Eccentric Mode" option in the settings menu.
- Ensure that "Eccentric Mode" is turned off. You can toggle it using the buttons.
- If using the app, go to the settings tab and toggle off "Eccentric Mode"
If the issue persists after this adjustment, feel free to contact our support team for additional help.
Not connecting is often due to OVR Connect not having permissions for wireless connections. The easiest fix is to delete and re-install the app, allowing permissions when prompted.
- Ensure Bluetooth is enabled on your mobile device and that the OVR Connect app has permission to access Bluetooth in your device settings.
- Restart the OVR Velocity device by turning it off and on again.
- Check the connection status on the device:
- Velocity: Green indicates the device is connected. Red indicates it is not connected.
- Jump, Sprint: Small link icon appears on display when connected
- Close and re-open the OVR Connect app, tap the link icon in the top right corner, and wait for your device to appear in the list. Tap on your device to connect.
If the issue continues, please reach out to our support team for further assistance.
If your OVR Velocity device is not charging, try the following steps:
- Check if the charging LED is lighting up:
- Red indicates the device is charging.
- Green indicates the device is fully charged.
- Make sure you are using the provided USB-C charging cable. Avoid using chargers designed for laptops or other devices.
- Try a different charging block or port to ensure the issue is not with the power source.
- Inspect the USB-C port on the device for any debris or damage that might obstruct charging.
If the problem continues, please contact our support team through our website for further assistance.
General
Every OVR device runs on a 3.7 V rechargeable lithium battery.
| Device | Capacity | Watt-hours |
|---|---|---|
| OVR Sprint sender | 900 mAh | 3.33 Wh |
| OVR Sprint receiver | 1500 mAh | 5.55 Wh |
| OVR Jump sender | 2000 mAh | 7.4 Wh |
| OVR Jump receiver | 2000 mAh | 7.4 Wh |
| OVR Velocity | 2000 mAh | 7.4 Wh |
| OVR Force (per plate) | 8000 mAh | 29.6 Wh |
Watt-hours are capacity multiplied by voltage, so 2000 mAh at 3.7 V is 7.4 Wh.
Airlines allow lithium batteries under 100 Wh in carry-on without special approval. The largest OVR battery is 29.6 Wh, so every OVR device sits well inside that limit.
Contact us
Can't find your answer? Send us a message and we'll reply by email.